Categories
Design Tips Slaite Library

Design your print-on-demand apparel in 4 easy steps

You’re beginning your online custom apparel business journey and need help designing? We’ve got you.

Step 1: Sign up with Slaite

The first step is to create an account with the Slaite app, your print-on-demand drop-shipping provider, to begin your design journey. It’s free and easy to use.

Step 2: Browse our catalogue

Next, you’ll want to review the product offerings available on the Slaite catalogue.

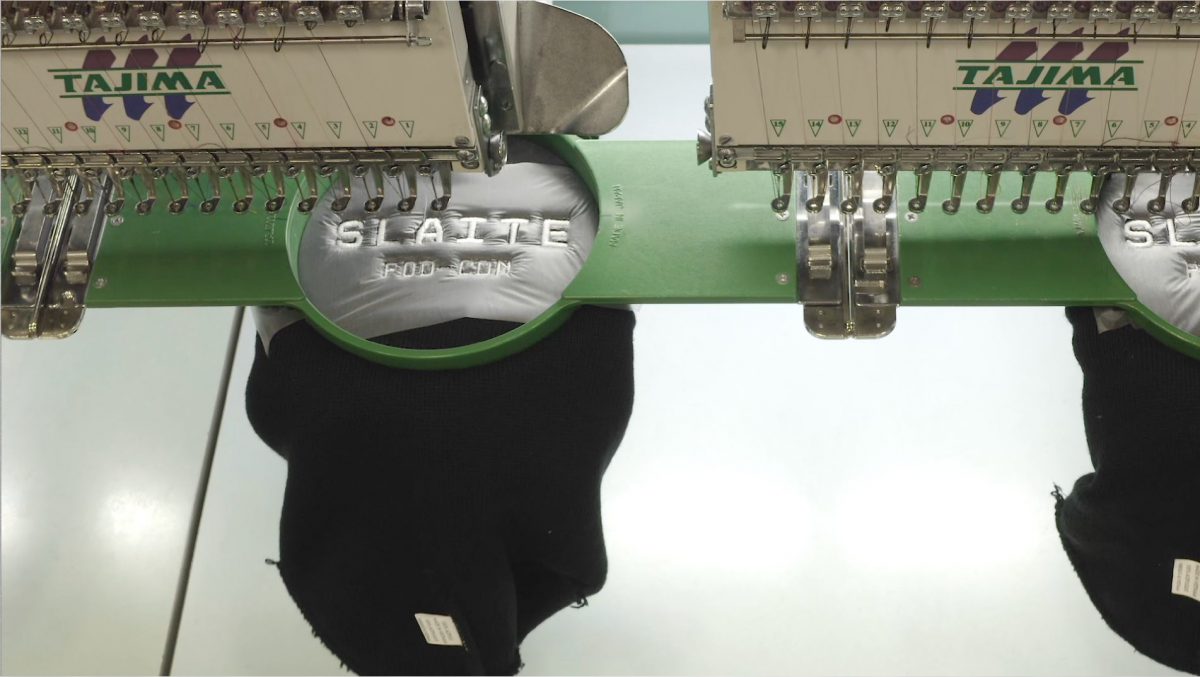
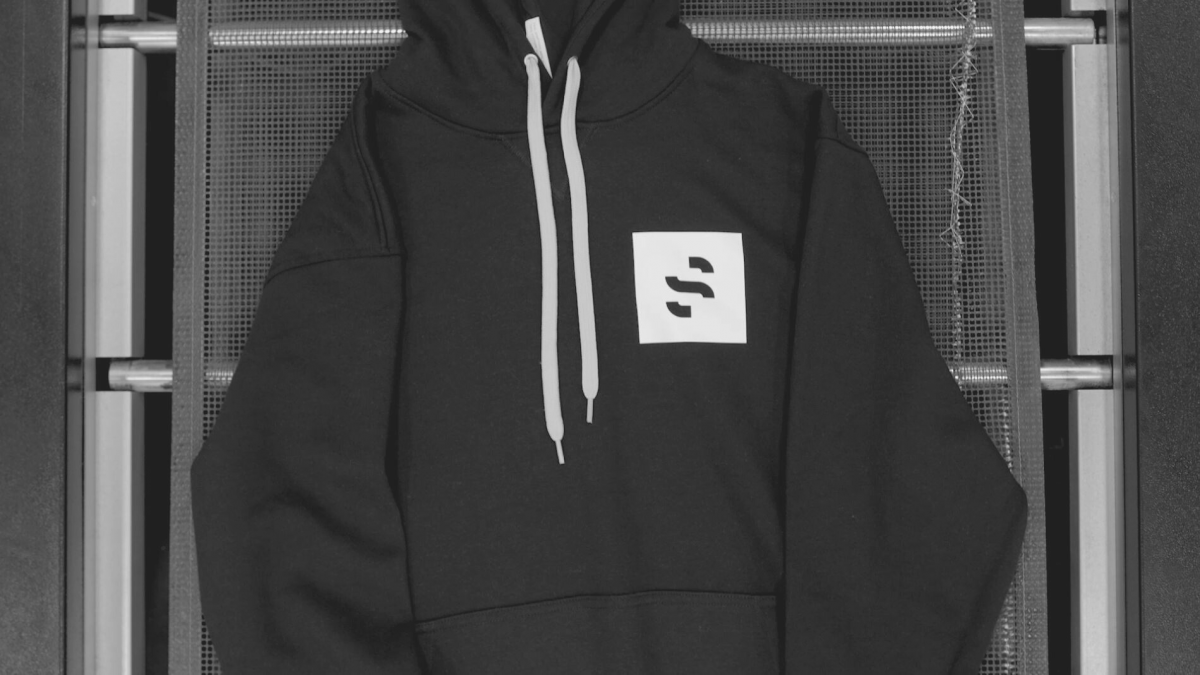
We offer tank tops, t-shirts, long sleeve tees, sweatshirts, hoodies, zip up sweaters, jackets, hats and masks. We’re always looking to bring on new products offerings for you to design.

Once you’ve decided what products you want to offer on your online store, you can begin designing them in the Slaite design studio.

Step 3: Check your artwork quality

To print or embroider a design, you’ll want to ensure your file meets the correct criteria. Our FAQ is full of information about design specs and we’ve linked to the appropriate answer below.

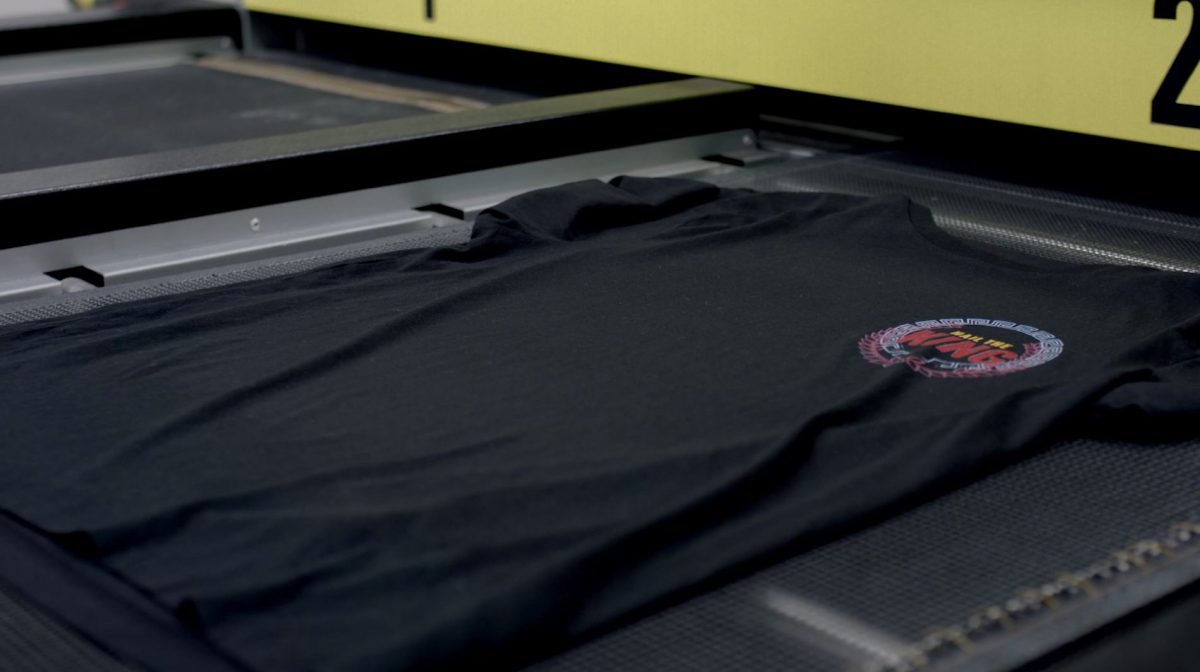
You’ll want to ensure the design and the garment are not the same, or too similar, in color. For example, printing an all-black logo on a black or dark grey shirt may not result in a striking design. If you have an all-black logo, we recommend printing it on a lighter color garment. Alternatively, you can change the logo or design to a lighter color to print on a dark garment.

Step 4: Design your product

Creating with Slaite is easy. You bring your vision to the garment and it is our mission to fulfill and deliver with quality and speed.

If you’re new to designing garments, we’ve provided some helpful tips and quick videos covering the tips. Good luck!

Helpful hacks:

More of a visual learner? We cover the helpful hacks in this video. Check it out!

  • In the Slaite Design Studio, you’ll notice a box with a green dotted outline. These guidelines show where you can place your design. If you place your design outside the green dotted line, it will not be printed or embroidered.
  • Stretching your design in the studio will lower your dpi and ultimately lower your printing quality. If you want to make your logo or design larger, we suggest increasing the size in your editing software to accommodate the larger size you want.
  • If your design is poor in quality or at-risk for not being printed because it is outside the green dotted guide, our helpful alerts will notify you and you can adjust the design location or resolution.
  • The rulers at the top and bottom of the window provide an estimate for the size of your design.
  • You can create your own design in the studio by adding your own text and shapes or altering your image.
  • Cloning your logo or design can create a unique pattern or collage. You can reorganize the objects and truly customize the design on the garment.
  • The Slaite design studio lets you customize what tools and guides you use during garment design.
Categories
Design Tips

Top 5 fashion trends of 2021 for your print-on-demand business

We show you how to leverage the most popular 2021 fashion trends in your custom apparel designs.

If you’re looking to spruce up your custom apparel gear with the most popular fashion trends for 2021 but need inspiration, look no further. We’ve got you.

We researched and compiled the top 2021 fashion trends in the article below. We share ideas on how you can use these trends in your custom collections or even designs in the coming months.

Loungewear

The proof: Let’s begin with the obvious. Loungewear popularity exploded last spring and there is no sign of slowing this trend.

How to: Add your creative design to any of our cozy sweaters to become your customers’ staple loungewear piece. Our top pick is the Independent Midweight Full Zip Hooded Sweatshirt. The best news? You can print or embroider this garment, giving you complete creative freedom.

Masks

The proof: Another obvious choice. In a TrendHunter report sharing the top 100 trends for 2021, we noticed over 20% of trends were related to masks. Not only is mask popularity and demand increasing but matching mask sets ranked #30 of the 100 trends. Black masks were deemed one of the most popular accessories – and we’ve got a black mask waiting for your creative design!

How to: Consider adding your creative design to both a black t-shirt and black mask as a bundled set in your online store. Our top picks are the Reusable Organic Cotton Mask and the Bella Canvas Greenwich Unisex Tee.

Logomania

The proof: Logos were declining in popularity in 2020 but according to Vogue France, designers have brought logos back through collages, neon effects or patchwork logos for streetwear.

How to: This is your opportunity to leverage logo popularity and design crave-able products for your customers! Use your logo in various designs, such as a neon effect applied to your existing logo, to give your traditional logo an updated or exclusive feel.

Color

The proof: Pantone announced its annual color of the Year as a sunshine yellow and a cool grey. The sunshine yellow, Illuminating 13-0647, and the cool grey, Ultimate Gray 17-5104, are meant to signify sunshine peaking through the clouds. Sorbet pastel tones and earth tones are also seen throughout Spring/Summer fashion shows suggesting a move away from harsh, bold or neon colors.

How to: If your brand makes new designs consistently, consider adding in the Pantone Color of the Year, sorbet pastels or earth tones into your new designs. Alternatively, you can place your designs on garments available in pastel colors or earth tones. Our top picks include Independent Women’s Lightweight Hooded Sweatshirt, Independent Midweight Hooded Sweatshirt, Alstyle Ultimate T-Shirt, Next Level Ladies CVC Crew Tee and the Yupoong Classic Dad Cap.

Baseball Caps

The proof: Baseball caps were featured in Summer 2021 collections and notable celebrities have been seen sporting this accessory.

How to: Play ball and put your logo on the Yupoong Classic Dad Cap to bring your brand into this trend.

If you have any other design questions, feel free to send us an email or DM us on Instagram.

Categories
Design Tips

6 Best tips for custom embroidery

Need some help for embroidery best practices? We’ve got you.

What is embroidery?

Embroidery decoration sews your design onto your chosen garment using a needle and polyester thread. A backing is placed on the inside of the garment to ensure the embroidery stitches do not unravel. Slaite uses a fully automated process where machines read a digitized pattern of your design to reproduce your creativity onto a product.

Why use embroidery?

Embroidery decoration has a vintage aesthetic. Embroidery immediately turns a blank canvas into a classic style. In addition to the classical look of embroidery, this decoration type is significantly durable. Since the design is sewn directly onto the garment, it can withstand wash and wear. Here’s an example to show the journey of a logo to a digitized image ready for embroidery.

Original Logo
Logo courtesy of Canadian Threads
Digitized image for logo placement larger than 3″
Logo courtesy of Canadian Threads

When a logo is placed on a location smaller than 3″, for example: on the side of the hat, it is wise to consider the outline, shadows and fine details of the image. These may need to be removed which will result in the below image.

Digitized image for logo placement smaller than 3″
Logo courtesy of Canadian Threads

Consider these key elements:

Risky Material

When selecting your product to embroider, it’s important to consider the type and weight of material. A lightweight, polyester t-shirt with stretch is not a good match for embroidery. The slippery fabric often stretches when embroidered and your design will end up looking disproportionate. When using embroidery on a garment, it’s best practice to use a heavy material that can withstand the decoration.

Slaite strongly advocates for research and testing. We ensure any product available for embroidery was tested for quality, so you don’t have to play a guessing game.

Read the Fine Details

Typically, details in embroidered designs work great. However, when the details contain a lot of fine lines or small elements, your logo may be distorted. This happens because the polyester thread appears thicker than laser-specific ink with Direct to Film (DTF) printing.

Before a design is embroidered, the design image undergoes a digitization process. This process changes your artwork into a readable digital file for the embroidery machine. While some complex designs may be simplified slightly to ensure it can be rendered onto the garment.

Color Instincts

While there are no significant color restrictions, embroidery is unable to blend colors how DTF print can. When using color in your embroidery design, it is best practice to use clean color breaks to ensure your design looks crisp and vibrant.

Location, location, location

When designing your custom garment, it’s important to consider the location of the embroidered design and how that location will change when the garment is worn. For example, choosing the chest, sleeves or back of the neck locations to embroider is likely a great way to ensure the garment doesn’t fold during wear and obscure the look of your design.

Tip Your Cap

Hats are among the most difficult garments to embroider because the stitching is conducted on a curved object. Consider using simple designs with clear lines when designing a hat to ensure the design integrity.

Sampling Encouraged

We always encourage our Creators to purchase samples (at cost!) to get an idea of the look and feel of their custom garment. It’s the best way to ensure the products you sell on your online store are exactly how you envisioned them.

Have more questions?

Don’t hesitate to reach out to us if you have more embroidery questions!

Categories
Design Tips

BEST DESIGN TIPS FOR DIRECT TO FILM (DTF) PRINTING

Implement these best practices for design to ensure your DTF garment stands out

You’re beginning your e-commerce, print-on-demand journey. You’ve got ideas, an aesthetic and the target market. Your designs are carefully curated to represent your brand and identity, but you’re concerned how the design will turn out.

As the technical experts, we know the amount of work needed to create a masterpiece and we want to help you keep the integrity of your design when they are rendered on a garment. Whether it’s your first time working with print-on-demand or you’re a seasoned pro, a quick brush-up on best design practices and tips will keep you creating beautiful designs on high quality products for your customers.

Resolution: what is it and why does it matter?

Dots per inch (dpi) is a term used for spatial printing and refers to the number of individual dots that can be placed in one inch to make up an image.

With a lower dpi, the image will appear pixelated, stretched or otherwise warped. If you can imagine the evolution of digital graphics for video games, a lower dpi will produce an old school, boxy image and a high dpi will produce a crisper and more realistic image.

The optimal resolution for Direct to Film (DTF) printing is 300 dots per inch (dpi). If you are creating your custom collection and add an image with a low dpi resolution, you will be alerted by our in-app design tool to choose a higher resolution image.

Can’t find your image dpi?

If you’re onboard with dpi but don’t know if your image meets the requirements, it’s an easy find!

On a PC: Right click the image file and select “Properties” > “Details”.

On a Mac: Control-click the image and select “Get Info” > “More Info”.

Is it the right match?

Similar to dpi, if your file type is not compatible with the design tool or is too large, you will run into problems when designing your catalogue.

The best file types are jpeg, png, gif and bmp with a maximum size of 25MB.

Consider your composition.

Now that your design meets all requirements and reflects your creative mind, the next step is to select the design’s location on the garment. Our in-app design tool alerts creators when the design falls outside the designated printing location to ensure your artwork is rendered completely and not cut off.

Your design’s composition is also important to consider before printing. If your design contains multiple elements, it would be better suited for a larger garment to capture the complexity of the design. When your design has minimal elements, ensure the branding or imagery is strong enough to perform solo.

Be transparent.

If you want your design to stand out, you may think a contrasting background will make the artwork stand out on your garment. Typically, we see designs with transparent backgrounds truly stand out garments. Let your garment be the background for your design and let your creativity shine!

Color us happy.

We love color! But there can be too much of a good thing. The rule of three colours suggests that selecting three colors – not including black or white – is a design technique to give artwork dimension, vibrancy and cohesion without overwhelming the eye.

What’s your typography?

Choosing the right typography (font) for your design ensures your creativity and message are legible. If you’re using a script font, ensure your garment is large enough to capture the details and try alternating each line with a simple, easy to read text.

Still have unanswered questions about design or DTF? Check out our FAQ or send us an email and we will be happy to assist you.